What is a CPU?
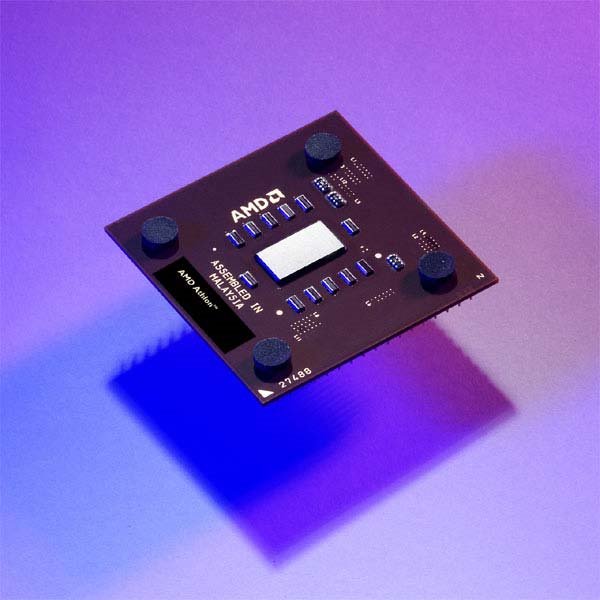
CPU is an acronym for the Central Processing Unit. The CPU is the main control center inside a computer. The Intel® Celeron® and Intel Pentium® microprocessors are two examples of CPUs.
What is Cache?
Cache is an area of that holds frequently accessed information for the purpose of speeding a computer system performance. A cache consists of ultra-fast static random access memory (SRAM) chips, which rapidly move data to the busses in the system.
Before Intel introduced the cartridge-based Pentium-II processor, cache was attached directly to the motherboard of the PC. This cache, ranging in size from 64 to 512K, normally runs at the system bus speed, no more than 66MHz.
Pentium-II processors took the cache off the motherboard and integrated it into the Slot 1 cartridge, attaching it to the circuit board surrounding the Pentium-II chip. This 512K cache runs at half the speed of the processor, which ranges from P2-266 - P2-600, producing cache speeds between 133 - 300 MHz.
Celerons integrated on-die 128K cache directly into the processor chip, eliminating the need for the circuit board of Slot 1 cartridges. To that end, the Socket370 spec was developed and Celerons have since abandoned the cartridge-based processors for traditional Socket370 chips. Although much smaller than the 512K of other Pentium-II class processors, the Celeron's cache runs at the full speed of the processor, which improves performance significantly.
The recently released Coppermine Pentium III processor follows the Celeron's popular design by integrating a 256k cache directly into the processor chip. Like the Celeron, this cache runs at the full speed of the processor (currently up to 800MHz).
NOTE: Cache can directly affect the performance of the PC, from the amount of time it takes to POST, to boot and to navigate the operating system and can affect system stability. If a system seems to be running slower than usual or otherwise tends to crash at random troubleshooting the cache may be necessary.
Troubleshooting Cache
The method to troubleshoot cache depends on the type of system.
Pentium systems
In most BIOSes, the cache can be turned off by putting the system speed into Compatibility mode. This turns off the L1 and L2 caches and slows down the CPU. If the performance/lockup problems go away, chances are the cache or processor are causing the problem. Swap with known good if possible.
If the cache is attached to the motherboard via a cache slot, you can pull the cache to test for system stability. If the system no longer crashes or locks up, chances are the cache or cache slot has gone bad. Try swapping the cache with a known good if possible.
If the cache is "cache down," meaning the cache is soldered to the motherboard, then there's not much that can be done. You can still run diagnostics on the "system set" and on "memory" to test the cache, but it cannot be removed. Swap remaining components with known good if possible.
Pentium II/III & Celeron systems
Some of the early BIOSes of these systems allow the system speed to be changed to Compatibility mode. If the stability problems go away in this mode, chances are the problem is with the Pentium-II Slot 1 cartridge (which contains the cache and the processor). Swap with a known good processor if available.
What Is Hyper-Threading Technology?
HT Technology is an Intel® processor-based technology that can help enhance computer performance by allowing one physical processor to function as two logical, or simulated, processors. Two logical processors create the capability for a computer to perform certain tasks simultaneously.
HT Technology requires an operating system that is optimized to use HT Technology. The Microsoft® Windows® XP operating system is optimized to take advantage of HT Technology.
Hyper-Threading is a way to more fully utilize the CPU. The operating system will see two processors where there is only one physical CPU. This allows, in the end, the CPU to complete more tasks during each clock cycle.
While many software programs can benefit from HT Technology, some software programs have not been optimized for HT Technology. Some software programs may cause the computer to run more slowly with HT Technology enabled in the System Setup program. Contact the software manufacturer for updates and information concerning use of your software with HT Technology.
Note that this is not exactly equivalent in performance improvement to actually having two physical processors in the system; however it is likely to improve application operations during multi-tasking.
For example: If a virus scan is being run in the background and the user is working on the system, the customer is likely to notice that the background scan interferes less than usual with other tasks the customer is performing.
 How Do I Determine If I Am Using Hyper-Threading Technology?
There are two steps to determining if you are using HT Technology:
To determine how many physical processors your computer has, perform the following steps:
NOTE:Computers with a Pentium 4 processor have a maximum of one physical processor in the computer.
Click the Start button.
Right-click My Computer.
Left-click Properties.
Check for Intel Pentium 4 processor under the Computer heading.
To determine if your computer is currently using the HT Technology, perform the following steps:
Click the Start button.
Right-click My Computer.
Left-click Properties.
Click the Hardware tab.
Click the Device Manager button.
Click the plus sign (+) next to Processors.
If HT Technology is enabled, the processor is listed twice.
Enable Hyper-Threading in the BIOS (System Setup)
You can enable or disable Hyper-Threading (HT) Technology through the System Setup (BIOS) program.
NOTE: If your processor does not have the HT Technology, there will be no option in the System Setup program to enable or disable Hyper-Threading.
To enable or disable HT Technology, perform the following steps:
Reboot the computer.
When the Dell logo screen appears, press the < F2 > key until the computer enters the System Setup program.
Press the < Down Arrow > key until CPU Information is highlighted.
Press the < Enter > key to display the available choices.
Press the < Up Arrow > key or the
key to highlight Hyper-Threading.
Press the < Spacebar > to toggle between Enable and Disable.
Press the < Esc > key to exit from the CPU Information menu.
Press the < Esc > key to Save and Exit.
Press the < Enter > key when you are prompted to Save changes and exit now.
When the computer reboots into the operating system, general system information programs such as Device Manager and Task Manager will show two processors if you enabled HT Technology. If you disabled HT Technology, the system information programs will show one processor.
NOTE: The General tab of System Properties will show one processor regardless if HT Technology is enabled or disabled. This is normal.
System Requirements for Hyper-Threading Technology
Hyper-Threading (HT) technology was available by the release of the 2.40C GHz processor with the 800 MHz front-side bus (FSB), but it was not released in time for the Intel 2.40C GHz processor and therefore was not released until the 2.60C GHz processor.
If you have a 3.06 GHz or faster processor, you can use HT with a 533 MHz FSB. However, if your processor is 3.06 GHz or slower, you must have an 800 MHz system bus and the system board must be using one of the following chipsets:
Intel® 925X Intel® 915G Intel® 915GV Intel® 915P Intel® 875P Intel® 865PE Intel® 865G Intel® 865GV Intel® 848P
Which operating systems are supported?
Windows XP
Hyper-Threading will work correctly on Windows XP gold and Windows XP SP1, both Home and Professional. If Hyper-Threading is turned ON in System Setup then Device Manager, Performance Monitor and Task Manager will report 2 processors on a single CPU system, and on a dual CPU system they will report 4 processors.
Some applications are known to have problems installing or running on systems with Hyper-Threading turned ON. Microsoft and Intel have worked together to incorporate application compatibility fixes into WinXP SP1.
Microsoft has also provided an application compatibility update, Q329568, for Windows XP gold, however it must be downloaded separately from Microsoft. Dell will factory install the application compatibility update in Windows XP gold, however if a customer reinstalls the operating system they will need to either download the application compatibility update or upgrade to SP1. The update, Q329568, enables many games to work correctly with Hyper-Threading enabled.
Windows 2000
In addition to Windows XP, the Precision 350 offers Windows 2000 SP3. The WS350 only supports a single CPU. If the customer chooses to go to System Setup and turn on Hyper-Threading then Device Manager will show two CPUs, as well as Performance Monitor and Task Manager.
Note: Dell and Intel do not recommend that Hyper-Threading be turned ON for Windows 2000 systems.
Dimension systems do not ship with Windows 2000, however if a customer chooses to install Windows 2000 it will behave the same as described above.
Linux
Precision Workstations ship Linux on all boxes. The Precision 530 with Red Hat Linux 7.3 or higher, the Precision 350, 450 and 650 with Red Hat Linux 8.0 or higher, all include support for Hyper-Threading. Dimension systems do not ship with Linux.
Is anything special needed for applications?
Some applications will perform much better on systems with Hyper-Threading enabled. Some applications, however, are not optimized for Hyper-Threading and may in fact not work correctly when Hyper-Threading is turned ON.
On both Dimension and Precision systems Hyper-Threading can be turned OFF in System Setup if needed for application compatibility. A customer might also wish to contact the software manufacturer to get an update that will allow the application to take advantage of Hyper-Threading. However, before turning OFF Hyper-Threading, please see the section below for assistance in making any application work correctly with Hyper-Threading ON.
Application Compatibility
For those businesses and individual customers who need to make an application compatible with Hyper-Threading turned ON, for example, if they have one application that runs best with Hyper-Threading ON, but they have another application that does not install or run correctly with Hyper-Threading ON, they can use the Application Compatibility toolkit from Microsoft to create a "shim" for the incompatible application so that it will run correctly with Hyper-Threading ON.
Please refer these customers to the below article from Microsoft.
There is an application compatibility tool that is more difficult to use than the Program Compatibility Wizard (native to Windows XP, see Windows XP Help and Support for more information), but for an accomplished user the Application Compatibility Toolkit can solve a wider variety of issues such as issues created by Hyper-Threading turned ON.
Microsoft's KB article:
Description of the Application Compatibility Toolkit 2.0 for Windows XP http://support.microsoft.com/default.aspx?scid=kb;en-us;Q294895
More Technical Details and Reference Materials:
Intel Tutorial « Understanding Hyper-Threading Technology » http://cedar.intel.com/media/training/hyper_threading_intro/tutorial/index.htm
ARStechnica site: Introduction to Multi-threading, Super-threading and Hyper-Threading http://arstechnica.com/paedia/h/Hyper-Threading/Hyper-Threading-1.html
What is Intel SpeedStep® technology?
Intel SpeedStep® technology is the latest feature in the Intel line of mobile Pentium® III processors that allows the processor to be switched to a lower processor speed.
NOTE: SpeedStep technology is not currently applicable to the Intel Celeron® processor line.
Decreasing the processor speed can extend the amount of time available for battery operation before requiring that the battery be recharged or replaced. One can set a SpeedStep enabled notebook computer to automatically switch to battery-optimized mode when the notebook is not connected to an AC power source or set the computer to remain in maximum performance mode at all times.
Accessing Intel® SpeedStepT
There is an Intel SpeedStep® utility (launched by double-clicking the SpeedStep icon located in the system tray) that allows you to configure these modes. (Figure 1)
Figure 1 - SpeedStep icon
NOTE: You must have the Intel SpeedStep application installed for the Intel software applet to appear.
Intel Speedstep Simulation (MPS)
http://delltech.us.dell.com/support/mps//1latitud/spdstep
SpeedStep-Enabled Portable Computers
The following DellT portable computers currently provide Intel SpeedStep® support:
Inspiron 600M Inspiron 3800 Latitude D800 Latitude C500
Inspiron 500M Inspiron 3700 Latitude X300 Latutude C600
Inspiron 8100 Inspiron 2500 Latitude X200 Latitude C640
Inspiron 7500 Inspiron 2100 Latitude CPtV Latutude C840
Inspiron 5000e Latitude D400 Latitude CPt S Latitude V740
Inspiron 5000 Latitude D500 Latitude CPxH Mobile Workstation M50
Inspiron 4100 Latitude D505 Latitude CPxJ Mobile Workstation M60
Inspiron 4000 Latitude D600 Latitude L400 Latutude C810
NOTE: The Inspiron 8000 and Latitude D800 computers do not provide support for the Intel software applet in Microsoft® Windows®, but they do have a battery-optimized mode and a performance mode setting in the BIOS (System Setup).
Types Of New Generation Processors?
Dothan
Dothan is a second generation Pentium M processor.
It has the same pin design (478 pin PPGA) and utilizes the same socket (mPGA479M) as Banias, therefore any Dothan processor will fit any motherboard that currently supports Banias.
Dothan processors have 2MB of L2 cache, which distinguishes them from the Banias processor which has 1MB of L2 cache.
Model Minimum BIOS Required for Dothan Support BIOS Date
8600/8600c A08 5/27/2004
600m A11 5/27/2004
510m A05 5/27/2004
500m A08 8/16/2004
300m A07 6/28/2004
D800 A09 5/27/2004
M60 A05 5/27/2004
D600 A11 5/27/2004
D505 A05 5/27/2004
D500 A08 8/16/2004
D400 A05 6/28/2004
X300 A07 6/28/2004
If a Dothan is installed in a system with an earlier/unsupported BIOS revision, the following POST error message will be displayed:
***Processor Microcode Update Failure***
The revision of processor in the system is not supported.
Strike the F1 key to continue, F2 to run the setup utility.
To resolve this error, update the BIOS to the minimal supported revision or higher using the DOS bios update utility only.
Do not operate the system until the BIOS update has been performed.
Systems with Dothan processors installed on supported BIOS cannot be backflashed to an unsupported Dothan BIOS revision.
Do not attempt to backflash to a previous BIOS revision that does not include Dothan support.
Prescott
Prescott processors have 1MB of L2 cache. which distiguishes them from the Northwood processor which has 512 KB
Intel also doubled the L1 data cache from 8 KB to 16 KB
HyperThreading Technology Enhancements allows software programs to "see" two processors and work more efficiently. This new technology enables the processor to execute two series, or threads, of instructions at the same time, thereby improving performance and system responsiveness.
Scenario:
On an old system a FMB 1.0 rated Prescott processor (2.8, 3.0GHz) will run at speed and have all the same issues you would get with a typical processor that came out after the system board (no supporting BIOS update).
If the Prescott processor is designed for an 800 MHz front side bus, then (assuming the system board does not support 800 MHz) the processor will run at half speed due to 400 MHz system board bus.
If the processor is rated for FMB 1.5, and the system board is not an FMB 1.5 system board, then the processor will normally fall back to 2.8 GHz. But if the system board does not support the 800 MHz FSB, then it will run at 1.4 GHz with the supported 400 MHz FSB.
If the BIOS is fairly recent (LaPaz A04, Murphy A03, Cooper A05, Shepard A04, Phoenix2 A05, Gagarin/Wilson A08.) then the FMB 1.5 processor will be recognized and the following message is displayed:
"Alert! The processor is not supported on this system, and will run at a reduced speed.
Strike the F1 key to continue, F2 to run the setup utility"
SO FLASH THE BIOS!!!